



Six squat variations you must know!
 Author: Šárka Randáčková
 The squat is a very basic movement pattern, but in the gym we usually think of it with the axle on the back. However, there are many more options and they can often be more suitable for different goals and performance levels than the classic squat.
Below you'll find six variations that everyone should be able to do!
Goblet squats
These are the best teaching material for beginners or those who need to relearn the movement pattern of squatting. For the advanced, this can also be a great exercise if a proper weight or higher repetition count is added.
While it's not an absolutely necessary exercise for other squat variations, you can use it to evaluate if you're ready to move on.
- Hold the one-handed bar at the sternum with both hands.
- Start with feet shoulder width apart and thumbs slightly turned out. We don't all have the same pelvic width or are completely symmetrical, so adjust your stance according to where you feel the range of motion of your hips best.
- Try to grip the floor with your feet.
- Externally rotate your femurs with your glutes to keep your knees, ankles and hips above you.
- Keep your shoulder blades back and down. Tuck the center of the body by pulling the ribs into the pelvis.
- Descend in a controlled manner and as deep as you can while maintaining a neutral spine position.
- Reverse the movement by pushing into the entire foot.
- Press through by contracting the buttocks. Don't overdo it by contracting the lumbar spine.
- Avoid the common mistake of bowing to create artificial support for the one arm.
When it is best to exercise:
- When you are a beginner
- To achieve depth if you have a problem with it when squatting.
- If you are tall, have long femurs or have a problem with the back squat.
- If you only have access to one-arm dumbbells and kettlebells.
- If your shoulder mobility doesn't allow you to do back squats.
- To add a little work to your upper back and mid-body.
- To warm up the hips and ankles.
Bulgarian squats
They are as feared as they are effective. They are often called split squats with the back leg lifted. This variation is excellent as a compensation for all those bilateral exercises. They are ideal for maximizing the effect of your workout and managing the load on your joints.
- Rest your back foot on something elevated, ideally a bench or a roller on a front kick or straddle machine.
- Choose between one handed, one in a goblet position, a large axis or a safety axis.
- Keep your feet shoulder width apart. You're not training to walk on the rope, you're training to squat.
- Load mainly the front foot, through the entire foot. However, the main pressure should be through the heel.
- Try to keep the shin vertical and the torso forward if you want to focus more on the glutes. A knee forward and a more upright torso will put more strain on the quadriceps.
- Go to the edge of the hip range of motion. If the knee of your leaning leg hits the ground before you run out of hip range of motion, you'll have to stand on something with your front leg.
- The knee of the back leg may bend. There is no need to keep it flexed.
- Come all the way up to a soft sag in the front knee. Practice all the reps with one leg, then alternate. If you need to during a heavy set, take a short break between sides.
When it's best to practice:
- As a primary leg exercise if you have a sore back.
- To add volume to leg work without putting excessive strain on the spine.
- As a primary exercise on one leg.
- In programs for athletes.
- If you only have one-armed legs.
- If you are a masochist.
- As a knee-friendly variation of the lunge walk.
Box squats (squats to sitting)
These work quite magically if you have problems with range of motion or reaching depth.
They also work great as an exercise to learn to squat, or an alternative to the ugly technique of the classic squat. For the advanced, it's a good tactic to develop strength from the bottom and add variety to your workout.
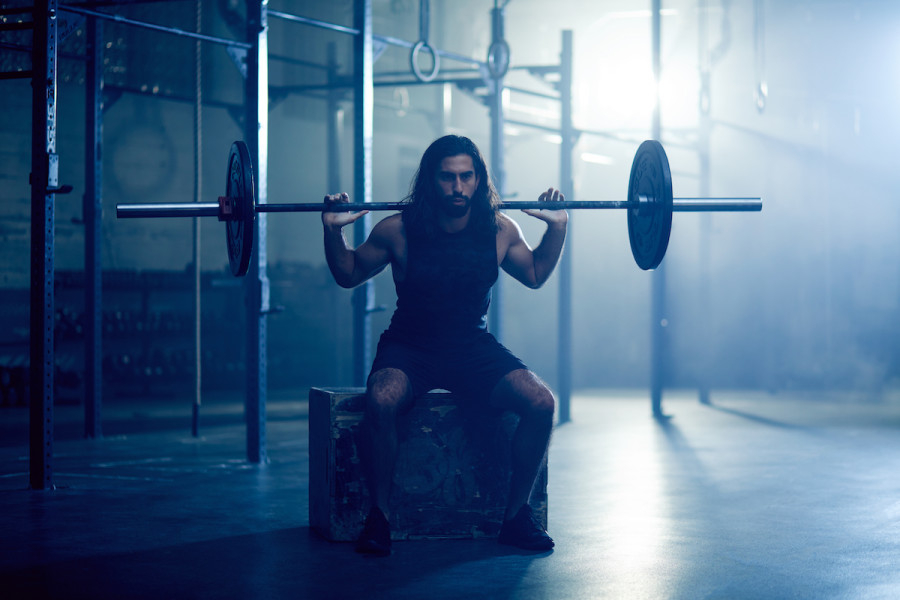
- Set up a crate or bench to the desired height.
- Choose the appropriate version of the squat: back, goblet, front or Safety Bar.
- Inhale and brace yourself at the top. Hold your breath and push all the way to the bottom until you approach or reach the top of the rep.
- Sit back on the box and land softly and controlled.
- Either touch softly or take a 1-2 second pause. Avoid a hard impact.
- Maintain the angle of your torso at the bottom. Resist the urge to sit upright and create momentum by leaning forward as you jump off the box.
When it is best to practice:
- As a training tool if you are a beginner.
- For goal achievement in shallow squats.
- To limit range of motion if you can't keep a neutral spine underneath.
- To develop strength and control in parallel or deeper positions using pauses.
- To help you sit more back in the posterior chain and heel.
- To help you learn to control a deeper range of motion (if you have passive range of motion in your hips).
Front squats
Think of front squats as an advanced level of goblet squats. Both benefit from a front load that supports a "true" vertical squat. Front squats just allow you to use more weight.
The upright stance of the front squat allows for more emphasis on knee flexion/extension and more targeting of the quadriceps for tightness and growth. Since the quadriceps take more of the load, there is potentially less stress on the posterior chain.
Having the load in front of the body also encourages a posterior weight shift, which helps taller lifters or lifters with movement limitations "bump up" squat depth almost by default. They're also one of the best exercises for cleaning up squat mechanics due to the increased demands on the mid-body, upper back, and posture maintenance.
Front squats tend to be spine-friendly because they reduce shear stress by minimizing excessive forward bending. The spine is more resistant to compression than shear force, which is why front squats are a better choice for weightlifters who want to lift heavy weights without causing lower back problems.
- Set the dumbbell in a rack at approximately shoulder height.
- Grasp the bar with an underhand grip, cross grip or straps with your hands approximately shoulder width apart.
- Before extending, wedge the bar just above your collarbones and keep your elbows up so that your triceps are parallel to the floor.
- As you take the bar off the rack and step back, set your feet in your preferred squat stance and brace your mid-body.
- Throughout the series, try to maintain a relatively vertical torso with your elbows at or above bar level.
- In general, keep the number of reps relatively low (3-6) due to the demands on posture and breathing/retraction.
Bonus tip: If you really want to increase your chances of looking like Quadzilla next Halloween, try lifting your heels onto your wedges or small plates to emphasize the bend in your knees.
When it's best to practice:
- To lighten the spine and reduce shear/compression stress on the lower back
- To encourage a more vertical squatting motion
- To exercise the quadriceps
- To improve squat depth and mobility in the hips and ankles.
- To improve squat mechanics and train position integrity.
- To enhance strength specific to the weightlifting squat
Zercher squats
Zercher squats mainly hit your quadriceps, load the middle of your body, load your spine and force you to keep your torso upright.
They will challenge your traps and rhomboids while challenging your ability to brace, breathe and maintain tension throughout your body. With these increased demands - along with the axis pulling you forward and down - your ability to maintain a fixed position with the axis on your back should improve significantly.
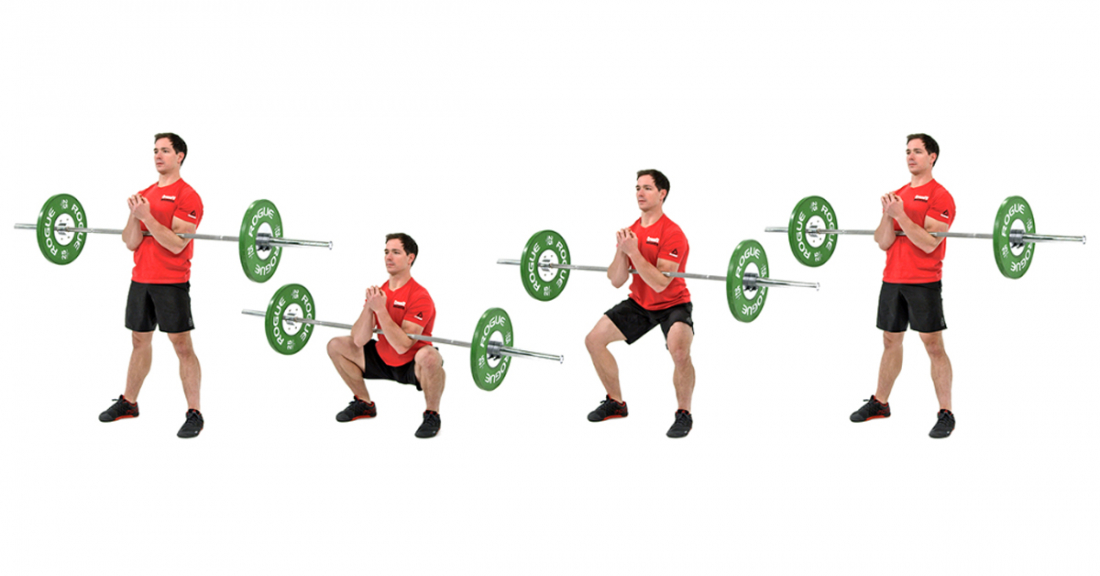
- Set the barbell in a rack at or just below sternum height.
- Stand under the axle with your hands together and palms facing the ceiling, then lock it in an elbow bend. Keeping your hands together will prevent your arms from opening. This allows you to use heavier weights, although you can keep them apart if you want to put more weight on your upper back and arms.
- Brace yourself, then "scoop" the bar up and tuck it into your torso to lock it in.
- Remove the bar from the rack, set yourself in your preferred squat stance, then settle the bar and "scoop" more air.
- Try to keep your torso relatively vertical throughout the entire performance while keeping your elbows tucked into your sides.
- Keep repetition numbers relatively low (3-6) due to the demands on breathing and bracing.
- You should eventually get used to the discomfort of your biceps and elbows, but in the meantime, you can put Fat Gripz around the bar, use an axle axle if you have one, or wear long sleeves.
When it's best to exercise:
- To hold the weight in front without using a weightlifting grip
- To improve full-body tension under load
- To develop strength for strongmen or combat sports
- To improve strength and trunk strengthening
- To improve back squat
- For training the vertically oriented squat with a new stimulus
Squats with safety axis
Safety Axis Squats are a hybrid between front and back squats. Like front squats, they promote a vertical squat due to the weight distribution and location of the axis. And like back squats, they have more weight loading capability than front weighted variants.
They're also gentle on the joints. If your shoulders aren't comfortable with extreme external rotation (like in the back squat), the greater comfort of a front-loaded axle can change the rules of the game. The weight is also distributed in line with the body, which can help reduce shear stress on the lower back.
The only limiting factor is your legs. You can destroy your lower body and pile on more quality volume of work without fatigue getting in the way anywhere else.
These squats are similar enough to back squats to have a direct transfer in strength, yet different enough to provide a slightly novel stimulus. One study comparing safety axis squats to back squats found that safety axis squats resulted in a 13.9% greater increase (35.8% vs. 21.9%) in strength in 1 RM of back squats than back squats alone.
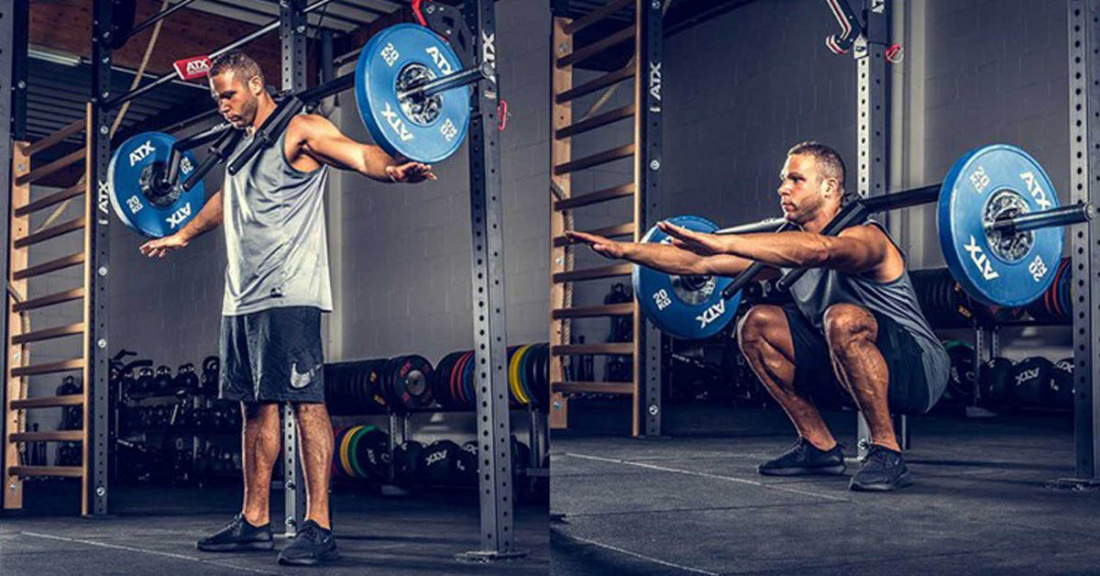
- Get under the axle and set the back pad just below the top of the trapeze.
- Raise your elbows to the point where your hands are at chest-to-shoulder height (not pressed against your hips).
- Just before and after the extension, adjust the position as needed so that the curve (weight) is flush with the center of the foot.
- When performing the series, try to maintain chest extension without letting the upper back slump forward.
- Keep your elbows still (rather than pointing down) so that the bar doesn't crush your neck.
When it's best to practice:
- To strengthen your legs without limiting factors getting in the way
- For a vertical squatting motion without the discomfort of a weightlifting grip
- To practice heavy squats without irritating your back or shoulders
- For portability to the back squat
Recommended
Nebbia Dvouvrstvá sportovní podprsenka FLEX 241
Nebbia Mesh legíny s vysokým pasem 573
GymSupps XGen
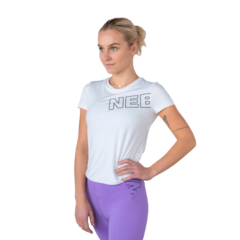
Nebbia FIT Activewear funkční tričko s krátkým rukávem 440
Source: www.t-nation.com - The 6 Types of Squats Every Lifter Should Master
Author: Andrew Coates & Charley Gould
Translated by Jaromír Uhlíř
Author: Šárka Randáčková No posts have been made yet.